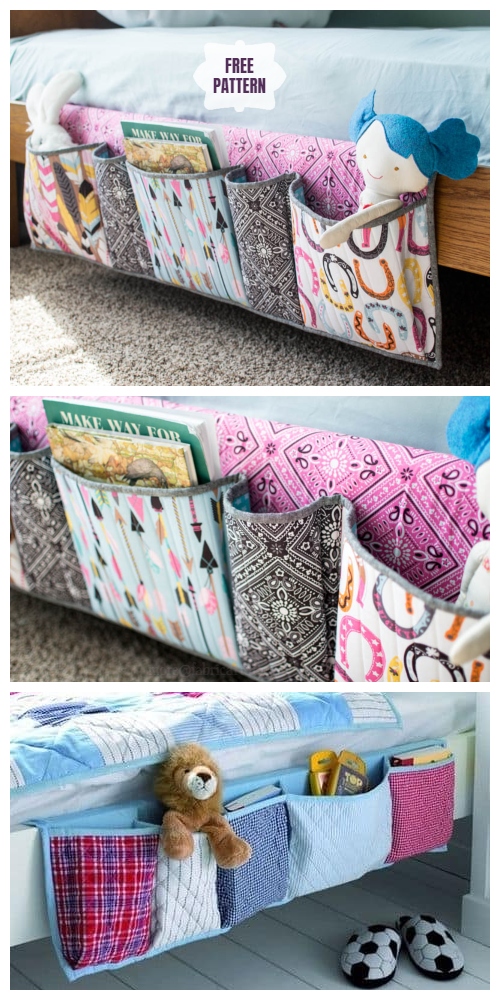
Sewing Patterns For DIY Fabric Wall Pockets And Organizers
If you're anything like us farmers, you probably love a good DIY project. That's why we're excited to share this amazing tutorial for a DIY Hanging Organizer with you! It's a great way to keep your home or office organized, and it's completely free!

How to Make a DIY Hanging Organizer
Here's everything you'll need to make your own DIY Hanging Organizer:
- Fabric
- Cardboard or chipboard
- Ribbon or twine
- Scissors
- Hot glue gun
- Pencil
Once you've gathered all your supplies, you can get started on the following steps:
Step 1: Cut the Fabric
Using your scissors, cut the fabric into a rectangle that measures 16 inches by 8 inches. This will be the pocket of your hanging organizer.
Step 2: Cut the Cardboard
Using the same dimensions as the fabric, cut a piece of cardboard or chipboard to fit inside the fabric pocket. This will give your organizer some structure and make it easier to hang.
Step 3: Glue the Fabric to the Cardboard
Using your hot glue gun, carefully glue the fabric to the cardboard or chipboard. Be sure to secure the edges and corners of the fabric as well.
Step 4: Add the Ribbon or Twine
Using your ribbon or twine, create a loop to hang the organizer from. Cut the ribbon to your desired length and secure it to the back of the cardboard with your hot glue gun.
Step 5: Add More Pockets
Once you've completed the first pocket, you can add more by following the same steps. Depending on the size of your organizer, you can create as many pockets as you need to keep all your items organized.
Tips & Tricks for Making a DIY Hanging Organizer
Here are some tips and tricks to help you create the best DIY Hanging Organizer possible:
- Use a fun and colorful fabric to make your organizer stand out.
- You can create a larger organizer by using a larger piece of fabric and cutting more pockets.
- Try adding labels to your pockets to help you remember what goes where.
- Hang your organizer on a command hook for easy access.
With these simple steps and tips, you can create a DIY Hanging Organizer that will keep your home or office neat and tidy.
So what are you waiting for? Gather your supplies and get started on your own DIY Hanging Organizer today!


Post a Comment for "Sewing Patterns For DIY Fabric Wall Pockets And Organizers"